Saturday, November 8, 2008

November 5, 2008: New Hope - and New Light


What an exciting night..and what a new feeling of hope in the air on Wednesday. It's a great feeling to know the world is watching and seeing America as a symbol of freedom and great possibility and inspiration.

Vin the Electrician must have been feeling inspired as well, since I came home to see this warm glowing feeling was not just metaphysical but also literal.
Coincidence? Hmmm...

Saturday, November 1, 2008

Trick or Treat... A Haunted Week

This week, the following things happened.. seriously.

Saturday
we cashed out all of our savings and put a deposit on a new (2005) Outback to replace our 99 Saturn RIP (YAY!!- ooooh -heated seats, CD player, working AC and heat, working radio, working engine.. these are some of the luxuries we are now reveling in)

Sunday
AM Maggie was throwing up with blood in it. Since by some strange coincidence we already had a vet check up/shots appointment for the other 3 critters, we dragged her along too, in the disgusting Saturn, which was simultaneously overheating and burning oil due to a crack in the head. After $800 worth of veterinary care, we drove home to drop off the monsters. Then, drove straight back to the Subaru dealer to trade in the junker and take home our new Ru. We literally high-fived each other as the Saturn rolled into the lot, spewing smoke.. we were terrified it would give up the ghost en route on her farewell voyage. Phew.

On the way home with the Ru, got a call from the vet- she wanted another round of bloodwork for Maggie before the end of the day. Kidney values out of whack. SO within one hour of owning the vehicle, our first passenger puked up in the back seat. So much for that new car smell.

Monday
was spent either at or in transit between home and the animal hospital emergency care. Monday took a financial toll and an even bigger emotional toll. The hospital vet wanted to keep Mags overnight and do a kidney biopsy (a quite risky and very expensive procedure). Since she had not vomited in 24 hrs I convinced them to let me take her home and to wait and see what the test results showed. we were sent home with 2 antibiotics and lots of fear for what the tests might show (kidney disease- glomerunephritis- was the tentative diagnosis)


Tuesday
I was doing field work in the rain all day. Day 2 in the Ryan family for the new 'Ru and she was already packed to the gills with equipment, and driven over sand hills, rutted roads, along power lines, and through giant lakes of stormwater. Seriously, if there was a flaw with this car I would have found it. I LOVE OUR CAR. (its now in NJ with Mr.LL... so week one and I think we put close to 1000miles on that thing). Maggie seemed to be doing ok but not great.. no more vomiting.. and the tests showed very high levels of lyme disease indication..with other results pending..she couldnt jump up on the bed or the couch and she seemed unhappy. But - she was eating and drinking and doing her business.. so she was less sick than over the weekend.

Wednesday
I worked from home for part of the day to keep an eye on Magster..she seemed a little better than the night before. By evening, she was barking at passersby and following me around the kitchen- very good signs.

Thursday
Another crazy long day in the field for me, and another long day at the crappy construction site for Mr. LL.
Maggie is like a whole new dog! We think the meds are really working their magic..seems like it might be lyme caused or something.. talked with our regular vet and she said to come in Saturday for more blood/urine work before deciding about the biopsy.

Friday
Lots of running around for work in the AM. And then...
I start getting weird phone calls..Some creep STOLE MY ATM CARD # and was running around ordering gold chains from Fortunoff and making charges to FedEx!!
Freaky. I still have my card, so they got the # somehow.. It *appears* that a major disaster was narrowly averted.. thanks primarily to the kind soul at Fortunoff in Long Island who called me to verify the $688 purchase when she couldnt get a signature verification. So, she SAVED ME because then I knew which card to have canceled.
After several hours on the phone, I had canceled the ATM card, checked my credit report via Experian and placed a fraud alert on it, spoke with FedEx and got the fraudulent account closed, and filed a report with Boston police. I also checked on my credit cards and no strange activity there. So far, it appears that none of the bogus charges actually hit my account.
But GOOD GRIEF.. what a way to end the week.

Saturday
Maggie to the regular vet for follow up tests.. But she is DOING GREAT! And our vet agreed we probably should not do the biopsy, and just wait and see.

With all that has happened this week, that was the best news of all..

Now I need a stiff drink.

Thursday, October 23, 2008

Too Many Minor Fiascos for One Evening

Here is a list of things that happened tonight.
- Mr.LL broke a glass in the sink (an omen of things to come)
- The tenants turned on the heat for the first time. About 20 minutes later there was a mini waterfall coming through one of our recessed kitchen light fixtures. It was one of those delayed-reaction moments, something like:
"what's that noise, do you hear that?"
"huh? It's nothing, its just the radiators hissing"
"Wait, no.. that sounds like dripping.."
"what the---"
"OH my.. &@$!!&$#@!!!!!!!!"

We dashed upstairs to find the leak... it was leaking profusely from the radiator side of the connection between the radiator and the steam valve stem. I sprinted downstairs for a towel and pipe wrenches to find that the dogs had gotten into the dogfood cabinet and were gorging from the bag of spilled dogfood on the floor.
- Back upstairs, in the process of attempting to tighten the leaking connection, we sheared off the radiator threads, breaking the connection completely. luckily by this time most of the (additional) leaking water had drained out and been caught into the bath towel. We were able to shut off the steam valve and call the plumber for a visit tomorrow.
- Nevertheless, the kitchen ceiling has surely sustained some water damage. the only saving grace may be that the water mostly ran out through the light instead of collecting in the ceiling. Time will tell. I've got a fan blowing on the wet spot and hoping for the best. I don't want to jinx it by saying it could have been a lot....but, you know.
- After recovering from that incident and settling down to a glass of wine, the SNL primetime special and a nail-filling/trim painting session, I proceeded to knock the cable box, along with my glass of wine (white- a minor blessing) onto the floor. Not breaking the glass, mind you, but in fact breaking the cable box.

- yes, thanks I'll take yet another glass of wine.. this one in a sippy cup please.

Ole! The Dining Room is (pretty much) dine-able!


Look there, is that the dining room floor? And-hey, theres actually a frame..around the door way..and check out my new FABULOUS SCONCES that I'm in LOVE with (Thanks Rejuvenation.com) ..no matter that they dont have lightbulb power yet, candle tealights will do for now..

yes we were able to have a cooking party in our kitchen and dining room last Saturday. It was a fantastic time with great friends, amazing food cooked by everyone, and a cozy new space taking shape. The added bonus was that the Sox won to force a game 7 with TampaBay. Hey-they didn't make it to the series this year, but at least they made us proud trying their best to get there.

Another good thing about the party was that it forced us to bust our butts to get all the baseboard and door frame trim in place and to clean up the space for the party.

LOTS more detail work to do (filling nail holes, caulking gaps in our less than pro trim handiwork) and painting trim. Oh yeah, and those windows.

Wednesday, October 8, 2008

Breaking Point

I've cracked


This broken window pretty much represented my mental state last night.

I @#!$*# hate windows. There are so many bloody components. Sashes, sills, balances, casing, glass, glazing, stops, trim. And when all of these components are either broken, rotted, cracked, missing, falling out, and/or all covered with lead paint... you think MAYBE its time so dig into that bank account and say goodbye??

Why on earth did we not just plan long ago on buying new windows for this project? Well, for one, I got it in my head years ago (bolstered by our experience with vinyl replacement windows in our last apartment) that somehow replacement windows were useless expensive hunks of earth-destroying junk. And in fact i'd still say that about cheap crappy vinyl replacements. And secondly, new windows are so damn expensive if you want good ones. So I set out on an excruciating crusade to restore the old wood windows. And after 6 years, I have restored exactly 3 of the 26 windows in the house. Even at that I paid the building co-op to reglaze them, because for some reason I just know I don't posses the patience to learn how. Notably, those three windows are in the living room. So there are two remaining nasty ones.

So I procrastinated and procrastinated all summer on getting to these.. but now as the nights dip into the lower 40s, there is no time to waste. Mr.LL and I set forth with conviction last night to mount an all out assault towards the restoration of the remaining two. As the true scope of the mess unfolded, my brain began to become paralyzed and I spent 15 minutes staring at the rotted glazing wondering what the hell was I thinking.

I snapped myself out of it, commenced with the paint removing heat gun, and was just breathing that first sweet whiff of lead fumes and... crackle.. the broken pane.. followed by a meltdown of disproportionate size to the issue at hand.

Wednesday, October 1, 2008

Words Cannot Express...


How happy we are to have walls again...but beautiful, smooth, flat walls this time..So I'll just let today's photos speak for us:

They did a beautiful job. Now all we need to do is pick out a paint color. Fortunately Chippy has an impeccable sense of style....

But picking out color swatches is taxing and requires much rest. Sleep on it, Chip and let us know your decision tomorrow. (For some reason he has such a bias towards the oranges and butterscotch tones...)

Monday, September 29, 2008

The Plasterers are Coming!

supposedly tomorrow morning.
HOORAY!

Sunday, September 28, 2008

It's Been Four Months......

"When are we going to have our living room back Mom?"


Sigh. I guess when you decide to hire your buddy/neighbor you trade off on a great price for being continually bumped down on his job priority list. Maybe this week???

The Great Grover Massacre - Soundproofing How-To DIY

One of the main benefits we hoped to achieve from this renovation was to dampen, to the extent feasible and within budget, the sound from our upstairs tenants. Upstairs is all hardwood flooring, and with no insulation between floors, you can -almost literally- hear a pin drop. At least you can hear EVERY squeaky footstep (this is called 'impact' noise- we don't have a problem hearing people's voices, thank goodness).

SOUNDPROOFING - STEP I- Mineral Wool

When we gutted the kitchen 2 years ago- we used Thermafiber mineral wool blankets to insulate the ceiling, on the advice of the fire-obsessed inspector, but what sold us was the soundproofing benefits of mineral wool (rock wool-same thing). And it does help. But, in the kitchen we used sisterboards bolted into the existing joists, and you can definitely still hear the footsteps above.

For this project we again used Thermafiber blankets as the first layer of insulation, which you see as that yellow stuff in all the pictures below. But we knew that would not be enough.
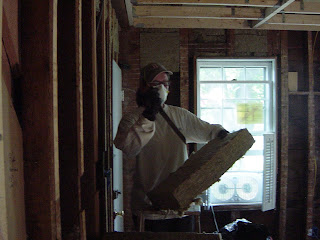
By the way- a word on mineral wool: GOOD GRIEF, is that stuff nasty to work with. This is not like the cute happy cotton candy pink crap. This is seriously nasty. Long sleeves, gloves, APPROPRIATE LUNG PROTECTION, bandanna around the neck, hat, eye protection, you name it. Then take a cold shower and dont rub your skin until after you've washed off the fibers. and for heaven's sake dont wash those insulation-y clothes with anything else. UGGH. Need i say more?

SOUNDPROOFING STEP II - Ceiling Frame

So in planning for this project i became obsessed with soundproofing and spent many hours on the web researching. What I learned right away, and our kitchen is case-in-point, is that no matter how much insulation you put, if you still have direct wood-wood contact you get vibrations, and that transmits the noise. So, you kinda have to either commit and do it up right, or else not bother. If you are going Pro- the best option is to request a suspended system for the drywall using resilient channel strapping. Since we went D-I-Y, this system seemed a little too complicated for us to wrestle with, so we looked around for other options.

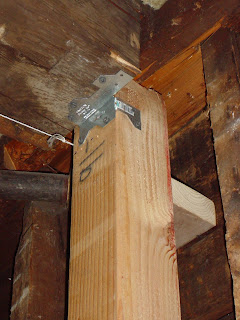
First and foremost, was the decision to build the slightly 'dropped' ceiling frame as we've described in earlier postings. The frame is secured to the perimeter joists of course, so there is wood contact, but the only direct contact with the ceiling joists is via the hurricane ties.

SOUNDPROOFING STEP III - Muppet Massacre

After some research, we knew that installing a second layer of insulation was going to be a key move. But what? More of that ITCHY mineral wool?? We just couldn't bear the thought. Then I read about recycled Denim insulation on my favorite soundproofing web resource: http://www.soundproofingamerica.com
The product picture shows a dude in *shorts* stroking this cozy looking furry blanket.
No Itching! I was already sold!... plus it's a Green product due to its 100% recycled content. The one drawback... its at least 3 times more expensive than regular insulation. But, we decided it was worth it.

We just tore sections of the 'blankets' (a very appropo term, they are so cozy that the dogs just curled up on the stray pieces) and draped them up above the strapping. When we were done, it did look like a whole army of Grovers had given their furry little lives to the cause:


Sure enough, even without the drywall up yet, we noticed that normal footsteps above were barely audible!. Still, I had one last trick up my sleeve...

SOUNDPROOFING IV - Green & Sticky - Acoustic Tape

One nifty piece of advice I also found from the web was the so-called "Poor Man's Float"..a way to help reduce sound if you could not afford the full "floating" ceiling/wall system. This green adhesive tape is made of thin foam (~1/6") and serves as a cushioning layer between the drywall and the studs to help reduce sound vibrations. Again, from www.soundproofingamerica.com It was fairly cheap, and easy as heck to put up, so that went up as the final (ok, yes, anal) step in advance of the plasterers..... who are at the moment...AWOL..

Saturday, August 16, 2008

LR/DR Mega-Update: Week 13- cleared for closure!

Well folks, we may suck at blogging but we're getting the hang of this renovation stuff. Finally... got that second inspector's signature we've been waiting for! Just in time for us to go away for vacation.. Ah well, we hoped to have the plasterers in and walls up before heading to the shore, but we'll relax on the beach knowing its ready to go when we get back. In fact we'll probably be finishing up the insulation over Labor Day weekend. The rest of this post i actually started last week but blogger didn't feel like publishing it. I'll just leave it here below. I cant believe we thought this project would only take until mid July. Ha! Also this week, we had insulation contractors come and install blown-in cellulose to the second floor apt and our first floor bedrooms. They worked from the exterior, and except for a trampled flower bed, you wouldn't even know they were here. Price was reasonable too. I think if we knew how easy insulating like that was, we might not have talked ourselves into the gut job!

***Draft Post from 8/16***
This blogging thing should really be done every couple of days so it doesn't all pile up and become unwieldy, right? Kinda like cleaning, or weeding the garden, or any of the other myriad chores of life.


Well, here goes. So much has happened i wont try to separate it into many posts. But i will do some separate detailed 'Lessons Learned' how-to posts on tasks that gave us particular headaches.

In short, we have got the building inspector rough sign off, and awaiting the electrical inspector (Monday) but then, we can bring in the plasterers and Close'er up!!!!!! Let me try to take it back in time. Here is how it looks right now: All three of the ceiling "Sectors" are framed and level, and secured to the joists with hurricane ties or L brackets: Leveling out the ceiling frame was by far one of the hardest parts. It took a whole lot of measuring and figuring. We were trying to squeeze out every bit of ceiling height we could so that made life harder. Handywoman had to make good use of her chiseling techniques to notch out parts of the frame in Sector 2. We found a 4" difference in level from the back to the front of the room! We also found that the best way to establish the level line was also the cheapest- a 50-cent string level. See future "Lessons Learned"-Level post for details. We also had to keep reminding ourselves that it didn't have to be level to the nearest 1/16th! Handywoman was overengineering for 1/8th; the plasterer had told me 1/2", so we compromised on a goal of 1/4".
Here are a whole bunch of pics from the project:

Inspector RayRay stretches after a long day on the job:


Psycho Insulator! Cutting mineral wool for ceiling with my best bread knife.


Leveling the ceiling in 'Sector 3' - the newer portion of the house. Here we used 2x4s as mini sisterboards nailed/screwed into the old joists. This was alot easier than the other sectors!:


The beautiful new pipe chase frame by Handywoman:


Among the many great lessons we learned from HW during this process was the thrifty but very smart practice of saving all of your scrap wood cause you never know when you might want to re-use it- plus its Green- we sure wish we had saved some of the things that went into our Dumpster.. but we did save and reuse a bunch, especially scraps of the new wood we bought. Another future post I plan..regarding old vs. new wood...

Pocket Door stud wall (entryway to the future 007 style hidden minibar), also all by HW:


This space was formerly the kitchen pantry. When we did that renovation 2 years ago, we walled off the pantry in order to maximize counterspace, with the thought in mind of breaking into the space during the dining room renov.. The Pocket Door Kit..was..maybe one of the biggest headaches of all. With the collective brainpower of 5 college degrees, plus the power of Google we could not for the life of us figure out the #@$!!& directions! Again, stay tuned for a Lessons Learned on Pocket Door installation...

More details to come soon...well, after vacay.. here's one more cute pic to end with:

Monday, July 7, 2008

Living/Dining Room Renov.- Tasks 1 &2 , Done!


Well, despite my efforts to sabotage the project,we managed to get the structural repairs completed over the holiday weekend. Thanks mainly to Handywoman's mad skills with the circular saw. She wields that thing like a ice sculpture artist with a chainsaw. More power to her. I'm still scared of that thing.

Mr. LL and I spent a miserable couple hours stuffing rock wool insulation up between the ceiling joists in hot sticky weather; but the feeling of accomplishment and momentum was certainly worth it.

Not to mention future money saved on heat, and sound dampening of upstairs footsteps (more on that next time). Here's some photos of the results so far:

In the overview photo above you can see the new rock wool ceiling insulation and the beginnings of our new dropped ceiling frame on the left.


Our insulation gets the Leo seal of approval for coziness:


Although he's not too happy now that his Fortress of Solitude has disappeared and he is reduced to hanging out on the floor with Chip and the dogs.


Here are some photos of the structural repairs... The Plumbers Special:


The south wall support (the one I measured 10 inches short at first):


And the other North wall support. This one is opposite the support shown above. Together these supports sort of frame the "newer" portion of the house that was added on.

These new supports will bump out into the room, which is sort of weird. But we've decided to embrace them as a restoration of one of the house's "original details". Um, that being..you know, structural support..

Carpentry for Dummies...

You know the saying- "measure twice (or thrice), cut once". Hell, I know the saying. But knowing and doing are two different things. Yeah, I screwed up. Pretty big..well not in the sense of -cut a hole in a gas line- big, but my screw up was a three-parter. Triple play, -set us back half a day-, big.

Just dumb. Here goes:

Part 1- Before we went to buy lumber, I had the job of measuring how long our 4x4 structural supports needed to be. Yes, 8 ft finished length, but we'd need 10'ers to cut down to extend to the joists and the sill. Realized this AFTER getting home with our 3 new 8 ft 4x4s.

Part 2- Headed out to a real lumberyard to remedy Part 1 and buy 3 x 10'ers. Tried my best to sight the wood and pick out straight pieces without major defects. Apparently I was distracted by the young man chatting with me at the lumberyard. Upon arriving home and laying them out on the floor, noticed one of them was as bowed as cowboys legs. Just un-usable. Strike two.

Part 3- Here's the best part. I had the job of measuring the maximum length of the support so we could cut down the 4x4 and notch it. My brain and motor skills were apparently so busy making sure to measure to the nearest 16th along a perfect plumb line, that I neglected to stick the tape down into the subfloor to the sill and instead measured to the finished floor. Handywoman (who now double checks all my measurements) then meticulously notched both top and bottom of the post to make it fit like a glove. When at last we triumphantly lowered the post into the floor.. Yep, about 10 inches short.

How pathetic am I?? We all laughed pretty hard but I wanted to crawl down into that hole in the subfloor and die.

Monday, June 23, 2008

Moving Forward, Stumbling Back..

So, ever so slowly, we're finally moving into construction phase. Let me play some catch up here. So, the building inspector took a look at our mash-up of a house and mumbled in his thick Boston accent that a we would have to get a licensed "ahk-itect" or structural engineeah to take a look and write up some kind of plan to address things like this- what we like to call "The Plumber's Special":

about 7 inches of the exterior 8x8 rim joist hacked away to route a steam pipe, leaving the central beam ("the Beast") notched in and supported by only about an inch or so of structure. Now of course we were planning to shore up things like the Plumbers Special anyway. The Good News part-- is that Landladylike happens to work in an engineering firm so could fairly easily get a kind coworker with a license to help us out. So, while the process of getting my P.E. friend out to the house, getting a plan write up from him, and getting the inspector's buy-in set us back several weeks, it only set our checkbook back the cost of a Home Depot thank you gift card! In the meantime while waiting for the structural go-ahead, we set about trying to hire someone with carpentry experience who would be willing to work with us instead of just handing over the whole job to a contractor. You see, Mr.LL does rough electrical work; I do the plumbing, but carpentry is probably the one area of home repair that we have close to zero confidence in ourselves. Not to mention lacking certain important tools such as a table saw. So several friends/acquaintenances were contacted...but no takers... Finally, just when LL was sinking into despair....the goddess of DIY shone upon us and it was Handywoman to the rescue!!Woo hoo!

She offered her assistance, tools and know-how for a modest fee. She promised to try not to OverEngineer the project. We promised not to sue if we cut our toes off with her saw. We agreed the overarching principle was to preserve our friendship at all costs. Then she and I set about together to overthink the heck out of the project while Mr. LL patiently waited for us to argue our way back to the original plan. Most specifically the question of how to build a level ceiling from a jumble of 1800s wood beams occupied our brains. A necessary task so that the plasterers will be happy when they come to hang blueboard. Since my brother (a contractor in California) used 2x8 wood sister boards bolted to the joists in our kitchen renovation, this method came to my mind first. And we actually got as far as loading up our cart at H.Despot with 12 x 12' 2x8's. It made good enough sense in the kitchen, with a space about half the size of the living/dining room. And without any joists or posts that had been mutilated. But looking at this monstrous pile of lumber and imagining attaching it to our (already structurally compromised) joists gave us all pause. We had also considered using lightweight steel studs as sisters, following this method However, at least the first plasterer we talked too scoffed at the idea of using steel- "flimsy stuff suitable only for commercial or tear-downable work". After a considerable amount of research, we came to the consensus that while the steel solution might be easier and more elegant; there were too many uncertainties (where to buy, what to buy, how to work with, how to attache recessed lighting) for our liking.. Plus, in a tradition-driven Beantown, its a safer bet that your Inspector and the other trades will be more comfortable with tried and true. So, we plan to build a 2x4 frame suspended from the joists. The drawback is we'll lose two inches of height. The plus (I think) is we'll lose some decibels of sound transmission through the creaky floor above. That, plus the mineral wool soundproofing insulation should be a big improvement! Next post...Carpentry 101..a lesson in measure thrice, cut once...

Thursday, May 22, 2008

Demolition Derby...aka Bee's Nests and Toilet Seats and Razor Blades -*Sigh*

what have we got ourselves into? we decided during a particularly drafty day this winter that we needed to GUT our living/dining room. This ancient (late 1800s) house has not one scrap of insulation in it (except for the first floor kitchen we gutted in 2006). Why not just blow in insulation? well.. we did consider that. But, we would have had to patch a boatload of holes. And the walls already looked like crap from 100 or so years of wallpaper, half-assedly scraped off and painted over with another 50 yrs worth of paint. Not to mention the suspect electrical wiring. So why not start fresh? We could insulate the heck out of it, especially the ceiling, and deaden some of the constant overhead creaking of our tenants' footsteps. Above is what it looked like before we started. As i was taking that picture I was filled with a deep feeling of dread. As in .. "WTF was i thinking? It looks damn good"

I wondered how soon into the project we would have our first "Oh, Sh*T" moment. Well, it came about 5 minutes in:


As soon as we pulled down the ceiling sheetrock layer, we found – what should not have been a surpsrise- ANOTHER ceiling. Plaster, lathe, strapping. Just like in the kitchen. But I guess we weren’t expecting it since the dining room half was just the one layer. We got a late start on a Saturday (1:30) and worked until at least *I* was ready to collapse around 7:30. And we had only finished the ceiling and the front wall facing the street. UGH. About 25% of the work. I was BUTT tired. I could barely stay awake at dinner. I’m so weak and soft from sitting in an office 8hrs a day!.. Mr. LL was fine since he runs around hauling cable everyday. Then showers, martini and tapas afterwards helped soothe my feelings of deep regret.

We finished the rest of it over a couple of weeknights. All the walls had two layers: Sheetrock over horsehair plaster and lathe. Here is the final product of all that hard work:
so you can see why part of me still questions why we went down this road...well, I guess its for the same reason i decided to spend endless hours restoring our old wood windows instead of buying vinyl replacements. Because i feel its the right way to do it. This house has been through multiple owners, the majority of whom seem to have just slapped another layer on until the whole thing is a pile of bandaids.. it feels right to strip back the crap (within reason- i'm not planning to touch the vinyl siding) to the bones of the house, and do it right.

People had been asking me "Well did you find any cool stuff? Old newspapers? Money??". Um.. NO. Here is what we did find:

An old bee’s nest occupying an entire cavity beneath a window.. luckily long since abandoned. What else?..Behind the bathroom wall- a zillion old rusty razor blades and one old toilet seat...ICKKKK..
An electrical junction box concealed in the ceiling. Oh yeah, and structural defects.. I'll save that for the next post.
Reliving this one has worn me out.

Tuesday, May 13, 2008

Bella Italia

ok, so obviously i'm not a very good blogger. i never kept a diary so maybe its some inherent personality flaw. or maybe its because i'm sure no one is going to read it and i'm too damn busy. on top of it, i'm slightly paranoid that if i post every rant about every tenant somehow one of them will read it and sue me.
anyway, too much has happened since my last entry to not post. It actually deserves at least two separate posts. Is that even allowed in the blogosphere? whatever who cares.

so, in April, Attic Tenant gave his notice he was moving out. I think sharing the place with a couple who had redecorated and cleaned was too much for his hermit-macho-man sensibilities. ok, fine. So he paid his rent and kept to himself, but there were the occaisonal 3 am arguments with his buddies from the bar that we could do without.

it took about 3 weeks to find a replacement- and actually The Couple found her while we were on vacation, so thats good. based on her name and looks she could be an Italian model slash actress. pro: she's quiet and nice. con: she's only staying for the summer. The only snag with the moving in process came when she realized that the room was not furnished. oops, sorry, but you didnt ask. So i got her a desk and a chair from our basement, which she was grateful about and she went and got a used mattress and box spring off Craigslist. (Please god dont' let it have bedbugs-- thats a subject for a whole other post). anyway it looked clean. problem there was that the boxspring wouldnt make the corner at the top of the stairs. oops again..what can i tell you. If you told me you were going to buy it i would have warned you to get a futon frame instead. Well, if she's aggravated she's good at hiding it. So far, i guess all is 'simpatico'.

Monday, March 3, 2008

clean sweep

ahh... out with the old, in with the new! Spring cleaning!. fresh start!.. and all that happy crap. Mr. DbT moved out last night officially. I even have his set of keys. No, we never recovered several hundresd + in back rent and other money we've lent him, but..i'm ok with that. and his unregistered car still sits in our driveway, but i'm even ok with that.. for now. now, if spring would hurry up and actually get here that would be nice...

Friday, February 29, 2008

Never a dull moment.. Wednesday a contractor came to rip out the second of our two old oil tanks taking up space in our basement since we converted to gas. On the plus side, it was quick and clean, and now we have about 250 gallons more of usable storage space down there in 'the dungeon'.

On the downside- they pulled the fill pipes too. But they neglected to fill in these holes. The fill pipes were drilled right through the sills of the foundation. Leaving two 2-inch diameter holes pouring cold air into the basement. So i stuffed them full of insulation for the time being but...geesh.

back to my last post.. wonder if there has been any moving action upstairs today. Today should be his last day...but its been deathly quiet up there the past few days.
I have a bad feeling I'll be getting angry phone calls from the new tenant over this weekend asking why Mr. D.'s stuff is still there.